 A healthy workplace is really important to staying productive and taking your output to the next level. A DIY stand up desk can help boost your productivity, increase your energy, and even help you live longer!
Turns out that sitting down all day is just plain bad for you:
“A 2010 study by the American Cancer Society found that women who sat more than six hours a day were 37% more likely to die prematurely than women who sat for less than three hours, while the early-death rate for men was 18% higher.” – Wall Street Journal
“It doesn’t matter if you go running every morning, or you’re a regular at the gym. If you spend most of the rest of the day sitting — in your car, your office chair, on your sofa at home — you are putting yourself at increased risk of obesity, diabetes, heart disease, a variety of cancers and an early death. In other words, irrespective of whether you exercise vigorously, sitting for long periods is bad for you.” – The New York Times
“The longer you sit, the shorter you live.” – USA Today
Feeling a little guilty? No worries! Your DIY standing desk is actually closer and cheaper than you may think.
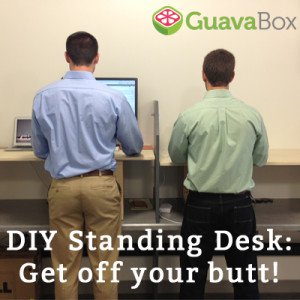
How to Build a Stand Up Desk
Get ready, we’re about to break down the entire process that we used to modify our 30-inch workspaces into custom-height standing desk workstations.
Find Your Ideal Standing Desk Height
Customizing your new standing desk to your height helps maintain good posture. Finding your custom height is easy, just measure from the ground up to your elbows.
Your goal is to work at your new standing workstation with your elbows at 90 degrees. This will keep your shoulders relaxed and help relieve the tension you can feel in your neck.
Measure Your Workspace
Our plan was to work with our existing 30 inch workspaces and modify them into custom stand up desk workstations. We decided to mirror the desk top surface area with our new stand up desk top.
If you’re building a removable standing extension on top of an existing workstation like we did, finding the height for your standing desk supports is easy. Just measure from the floor to the workspace surface. For most workstations, this will be around 30 inches. Then, take your elbow height measurement and subtract the existing workstation height.
For my station, my custom height was 47-inches, so I needed to build a 17-inch extension.
Head to the Store!
Our design is simple; we’re not winning any engineering awards here, but it’s functional! Simply use 2×4’s to create two box supports, one on the right and one on the left. Then use 3/4″ blond wood plywood for the table top.
Here is the list of lumber you’re going to need:
- 4 – 2×4 – 20″
- 4 – 2×4 – 11 1/4″
- 1 – 3/4″ sheet of Blond Wood (typically comes 4′ x 8′)
- 1 Box of 1-5/8″ drywall screws
- 1 Box of 2-1/2″ drywall screws
- 1 Package of 220 grit sandpaper
We were able to make two standing workstations with one 2×4 – 10′, one 2×4 -12′ and one 4′ x 8′ sheet of blond wood. We still have scraps around the office. 🙂
Make the Cuts
When you have the supplies you need, it’s time to get to cutting. If you don’t have a circular saw in the office next to the paper clips, just ask a friendly Lowe’s associate to help you make the cuts right in the store.
Sort and Sand
Take the pre-cut pieces and sand the edges. This will help make sure that the pieces fit together well and prevent against any splintering.


Use fine sandpaper to lightly sand the standing desk workspace.

Assemble the Supports
Use the 2-1/2 inch drywall screws to assemble your support structure.

Attach the Standing Desk Surface
Place your desired working surface on the ground. Now place your support structures where you would like them to live. We chose 8 inches in from the end and 1-1/2 inch lip in the front and 1/2 inch lip in the back.
Use the 1-5/8 inch drywall screws to attach the support structures to the working surface.

Add an Anti Fatigue Mat
Standing all day can get tiring, which is kind of the point. Tiring doesn’t have to be uncomfortable. Investing in a good anti-fatigue mat can help you keep standing strong!

Get to work!
